
Timber cladding substructure - a ventilated facade step by step
Cladding boards are not held by the wall but by the substructure: battens, sometimes counter-battens, and the fixings that tie them to the wall. The substructure decides whether air flows behind the cladding, whether the boards dry after rain and whether the facade lasts for years without stains. This guide walks through the layers, the batten direction, the ventilation gap and the choice of fixings.
The short answer
- Layers from the wall out: load-bearing wall, insulation (if any), battens, ventilation gap, cladding.
- Board direction decides the substructure: horizontal boards need only vertical battens. Vertical boards need counter-battens - otherwise the air has no way through.
- The gap must be open at the bottom and at the top. An empty cavity on its own does not ventilate.
- The substructure is fixed to the wall in three ways: straight into the masonry without insulation, through the insulation with an adjusting screw, or on brackets.
- Boards to battens - with a stainless screw, never a galvanised one. Tannin-rich timber such as oak or merbau needs acid-resistant steel.
What a ventilated timber facade is made of
The fixings manufacturer Eurotec describes a ventilated facade as a sequence of layers: substrate (load-bearing wall), insulation, substructure with fixings, air gap and cladding. The substructure consists of base battens, laid horizontally or vertically, and - where needed - support battens on top. Joining the two layers is what counter-battening means.
The substructure does two jobs at once. It carries the weight of the cladding and the wind suction into the wall, and it holds the boards far enough from the wall for air to flow behind them.
Ventilation gap and openings
Behind the cladding there must be a cavity, and the air needs a way in and a way out. The fixings manufacturer points out that the cavity on its own is not enough: air enters through openings at the bottom of the facade, rises and leaves through openings at the roof. This bottom-to-top flow dries the boards from behind.
Polish regulations give no figure for a ventilated timber facade. The reference is the German standard DIN 18516-1: cladding at least 20 mm from the wall or insulation (locally, at the substructure, the gap may drop to 5 mm) and inlet and outlet openings of at least 50 cm² per metre of wall length - at the base and at the roof edge. The same gap, at least 20 mm between insulation and cladding, is also given in the installation guide of a cladding board manufacturer.
The openings can be protected with a mesh against birds and insects. The mesh must not close off the cross-section.
Battens or battens with counter-battens - board direction decides
The air flows from bottom to top, so it must not meet a horizontal barrier across the whole width of the wall.
- Horizontal boards: vertical battens on the wall, boards on the battens. The channels between the battens run from bottom to top. One layer is enough.
- Vertical boards: horizontal battens would block the flow. So vertical battens (counter-battens) go on first, with horizontal support battens for the boards on top. The air flows in the vertical channels beneath the support battens.
Vertical cladding on a single layer of horizontal battens is a mistake you cannot see from outside - until the first stains from moisture appear.
What timber for the battens
Battens are a structural element. Eurotec’s facade catalogue assumes softwood battens of grade S10 at a moisture content of about 15 %. A cladding board manufacturer gives similar figures: S10 or C24, moisture content at most 20 %, cross-section at least 30 × 50 mm and 40 × 60 mm recommended.
Batten thickness matters for the fixing too. The length table for EiSYS-2 screws is calculated for a 40 mm counter-batten, and Eurotec’s design service assumes a support batten of at least 40 × 60 mm in C24.
Batten spacing - where it comes from
Batten spacing follows from the thickness and type of board, that is, from the cladding manufacturer’s instructions. As an example: one manufacturer of solid timber boards 18 mm thick gives a batten spacing of at most 65 cm, and at most 50 cm in a high-wind zone.
Do not confuse two spacings. Batten spacing depends on the cladding. The spacing of the points fixing the substructure to the wall depends on the fixing, the substrate and the wind load - and on larger facades it is a question for the design.
Membrane on the insulation - when and which
A facade membrane is often laid on the insulation beneath the substructure - vapour-open, meaning it lets water vapour out and protects the insulation from wind and water. The board manufacturer’s guide treats it as an option decided by the insulation manufacturer and the design, not as a precondition.
With cladding that has open joints, the membrane is exposed to the sun. A UV-resistant facade membrane is then needed - its manufacturer specifies how wide the joints may be and what share of the surface they may take up.
Three ways to fix the substructure to the wall
1. Without insulation, straight into the masonry. The battens are anchored into the wall with a fixing matched to the substrate - concrete, solid brick and perforated brick need different solutions. The Blue-Power system screw fixes a timber substructure to concrete and masonry without a plug, including at a distance through rigid insulation of at least 50 kPa. The manufacturer’s documents differ on ventilated facades, though - the product data sheet lists them, the 2025 facade catalogue describes the system for non-ventilated facades. For a ventilated facade we confirm the choice case by case.
2. Through the insulation, with adjustment. When the wall is insulated with mineral wool and the batten is to sit outside the insulation, an adjusting screw is driven through the insulation into the wall. It also lets you level the battens without wedges or packers. This option - with a length table for 60-280 mm insulation and the installation sequence - is covered in the guide fixing and levelling facade battens through insulation.
3. On brackets. Metal brackets are fixed to the wall and the substructure to the brackets. They allow large offsets and an aluminium substructure, but every bracket takes metal through the insulation layer. A timber substructure has the advantage here: timber conducts heat poorly and expands little, so it adds no unnecessary thermal bridges and no extra stress in the fixings.
Fixings for the first two methods are in the category facade fastening.
Substrate - what to check before buying
An example from the Blue-Power data sheet shows the scale: the same 180 mm screw with a 30 mm batten goes through 100 mm of insulation into concrete and solid brick, but only through 30 mm into vertically perforated brick. The adjusting screw through insulation has its own substrate conditions too - they are described in the EiSYS-2 guide.
Before you order fixings, establish the wall material, the insulation thickness and the facade height. With perforated blocks, aerated concrete and tall facades, write to us - we confirm the choice with a technical adviser before anything goes to site.
Fixing the boards to the battens
The cladding works outdoors all year, so the fixing must be stainless. Galvanised carbon-steel screws such as EiSYS-2 or Blue-Power are intended by the manufacturer for service classes 1 and 2 - they fix the substructure sheltered by the cladding, not boards exposed to rain.
- Hapatec black and Hapatec stainless are hardened stainless screws for service class 3, in diameters 4.0, 4.5 and 5.0 mm. The manufacturer recommends pre-drilling in hardwood and on facades.
- Tannin-rich timber is the exception. Hardened stainless steel is not acid-resistant, so the manufacturer rules Hapatec out for oak, merbau, cumaru and robinia. Such cladding needs an A4 screw - we do not stock one at the moment, write to us and we will source the right item. Why, is explained in the guide A2 or A4.
- Larch is a separate case, covered in the guide on larch decking.
The board manufacturer’s guide also gives rules for the screwing itself: a screw of at least Ø 4 mm and twice as long as the board is thick, pre-drilling at board ends with at least 3 cm to the end, and an open joint of about 10 mm at butt joints. Edge and spacing distances for a particular screw follow from the technical documentation and Eurocode 5 - not from feel.
The most common mistakes
- A closed gap. No openings at the base or under the roof - the air stands still and the boards dry only from the front.
- Vertical cladding without counter-battens. Horizontal battens cut the flow across the whole width of the wall.
- Boards too low. The board manufacturer’s guide gives at least 30 cm above ground - otherwise the board soaks up splash water from the ground.
- Butt to butt. Boards meeting end to end with no joint and no play at the corners.
- A screw right at the board end without pre-drilling. The board splits along the grain.
- Zinc or hardened steel in oak. Tannins are acidic: they react with zinc, and hardened steel does not resist them. Staining shows after the first rain, and the consequences show in the durability of the joint too.
- Undersized or wet battens. They warp and drag the cladding with them.
Frequently asked questions
What ventilation gap behind the boards? The reference is at least 20 mm according to the German standard DIN 18516-1, with openings at the base and at the roof.
Do horizontal boards need counter-battens? Usually not - vertical battens form the ventilation channels themselves. Counter-battens are needed with vertical boards.
What batten spacing for cladding boards? Whatever the manufacturer of the particular cladding specifies. For 18 mm boards, one manufacturer gives at most 65 cm, for example.
Can the battens be fixed through polystyrene or mineral wool? Yes, with an adjusting screw through the insulation into the wall - covered in the EiSYS-2 guide.
What should cladding boards be screwed with? A stainless screw - hardened Hapatec for most species, A4 for oak and tannin-rich timber.
And fire regulations? For buildings larger than a typical detached house, the facade materials and the way the cladding is fixed are decided by the design and the building regulations in force on the day of the application - that is a question for the designer.
In short
Board direction sets the batten layout, the gap must be open at the bottom and at the top, the battens must be dry and structural, and the boards are screwed with stainless steel - acid-resistant for tannin-rich timber. Fixings for the substructure and the cladding are in the category facade fastening, and if the wall is insulated, start with the guide to fixing battens through insulation.
Product from this guide
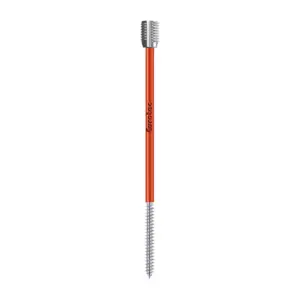 EiSYS-2 façade/adjusting screw
373,92 zł - 2 009,21 zł incl. VAT
EiSYS-2 façade/adjusting screw
373,92 zł - 2 009,21 zł incl. VAT
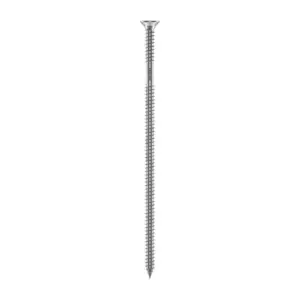 Blue-Power system screw
400,84 zł - 1 871,85 zł incl. VAT
Blue-Power system screw
400,84 zł - 1 871,85 zł incl. VAT
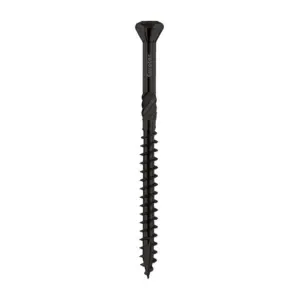 Hapatec black - screw for cladding and decking boards
159,11 zł - 496,38 zł incl. VAT
Hapatec black - screw for cladding and decking boards
159,11 zł - 496,38 zł incl. VAT
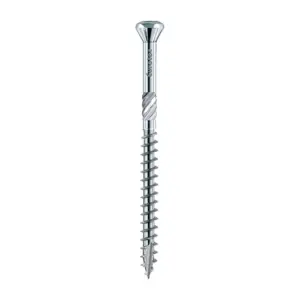 Hapatec stainless - decking screw for hardwood, hardened stainless steel
144,62 zł - 363,69 zł incl. VAT
Hapatec stainless - decking screw for hardwood, hardened stainless steel
144,62 zł - 363,69 zł incl. VAT